Rapid-prototyping an IoT Environmental Monitor
Part of being at the edge of tech innovation means ensuring everyone on the team is familiar with the full range of what your tech stack can achieve. In today’s episode, our adventurers – led by a software engineer with a knack for imaginative art projects – build a ground-up environment monitor using a very-low-power IoT microcontroller and sensor interface.
The goal of this project was to expand our development platform capabilities, and do some general hardware upskilling. We decided to create a weather station on an ESP32 microcontroller board with sensors that has the ability to send meaningful data from the device to the cloud via WIFI to be stored in a cloud-based data platform (yes, that’s code for “Google Sheets API” in this case – “as simple as possible but no simpler” is one of our favourite engineering principles).
A quick breakdown of the hardware we used:
- 1x ESP32 board
- 2x DHT11 temperature and humidity sensors
- 1x FC37 rain sensor
- 1x waterproof battery pack
We started by coding up some controller firmware using MicroPython, and flashed the ESP32 microcontroller with this. MicroPython is a great embedded development platform, using many of the same libraries as standard Python, and is very readable compared to alternative C-based microcontroller platforms. The two DHT11 temperature and humidity sensors were straightforward to use, as there is inbuilt support for this sensor in the standard MicroPython library.
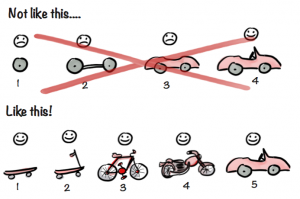
We looked at two possible APIs for uploading the data to the cloud: AWS IoT, and Google Sheets. While AWS IoT would be a robust solution in a commercial product, we really wanted to focus on the hardware side of things, so we went with the simpler API, Google Sheets, opting to store the data in a cloud-based spreadsheet. This is an important strategy we commonly take when rapid prototyping – use the simplest thing that achieves our customers’ goals.
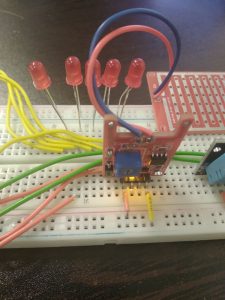
We then mounted the microcontroller along with the three sensors and LEDs on a breadboard for the prototyping phase, and connected the assembly to an IDE for quick development.
The main loop steps for collecting and sending data are:
- Wake up the board
- Connect to WiFi
- Register sensors and retrieve data
- Sign a json web token
- Send data to the cloud
- Receive a response
- Go to sleep for a configured period of time
After the prototyping phase was completed, we installed the device into a greenhouse, using a waterproof battery pack for power. One temperature/humidity sensor was placed inside the greenhouse, and one was placed outside along with the rain sensor, nearby a WiFi router for back-to-the-cloud connectivity. Once mounted, the device performed its main loop, sending through meaningful data to the Google sheet. We calibrated temperature results against a third portable thermostat to ensure we were collecting useful data.
Platform limitations
One of the limitations of using MicroPython is that there is currently a lack of driver support for some hardware made by Arduino. An example of this was a SPL06 barometer sensor that I was unable to get data from using MicroPython with the current available drivers. There are many ways we typically overcome these kinds of limitations in commercial products, from developing our own drivers (often in C), to finding other sensor options.
Next steps toward commercialisation
To progress a product like this toward commercialisation, we would start exploring with our customer how the product would be used in various real-world environments, and build up a set of design constraints from that.
This could include adding new features and sensors to the system, such as:
- Wind speed and direction
- Local storage for sensor data for retrieval by bluetooth
- Barometer
From here, the process would typically lead to a PCB board design phase, waterproof enclosure design, more robust calibration of the sensor array and hardening up the firmware communications protocols. Over time, this would progress to design-for-manufacture, adding more features, and growing the product from there.
23 November 2022 by Josiah Waldron

